A situation that cropped up in the shop today prompts us to set aside the Truck Corner mailbag this month and reinforce our frequent reminders of the importance of monitoring vacuum truck components.
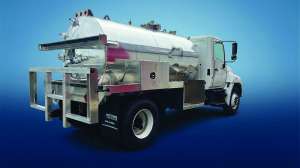
A customer pulled into our shop driving a six-year-old, 3,000-gallon vacuum service rig, complaining that he was under pressure to get a job started. But when he arrived at the work site, the pump wasn’t building vacuum like it should. To make matters worse, the tank wasn’t holding on to the vacuum once it was built up. “At this rate, I’ll never get done,” the exasperated pumper told us.
His boss told him to bring it in for us to look at and repair.
We have stressed the importance of regular and preventative maintenance in many articles over the years. Now we have photos to illustrate what happens when a pumper doesn’t pay attention.
When a pump isn’t building vacuum in the usual manner, our first thought jumps to worn vanes. The pump on this truck was a belt-drive Masport HXL15WV. Con-sequently, this setup involves belts, a driveline and a pillow block bearing.
TURNING WRENCHES
To diagnose the problem and make the repair, we started by removing the pump. This gave us a clear view of the driveline. The pillow block bearing had caused damage to the driveline. The pillow block bearing had gone bad and chewed into the driveline shaft. Look at photo No. 1 to see how much the shaft had worn down. It’s amazing that the driveline would still turn at all. So that was the first problem.
The next step involved breaking down the pump and taking a look inside. Sure enough, the vanes were worn down by at least 3/4-inch and misshapen. This alone will cause the pump to lose a good deal of normal vacuum. Photo No. 2 shows the damaged vanes, the second problem with the service vehicle.
Looking further, we noticed the flappers on the vacuum pump were nearly worn away. The flappers seal the pump so vacuum or pressure will not leak out. In this case, as mentioned, the flappers had disintegrated or broken off, the third issue involving wear items. Photo No. 3 shows what was left of the pump’s flappers. Photo No. 4 shows a new set of flappers.
The series of photos explains why the unit would not hold vacuum. Looking at the wear and tear, it’s amazing any vacuum was being generated.
So how does a truck owner avoid these kinds of problems? First, check belt tightness and bearing condition on a regular basis. Grease them every 40-50 hours. Secondly, check vanes annually and replace them if they are bad.
Typically, flapper valves don’t go bad. In this instance, either the pump had been rebuilt or had absorbed too much heat. This led to the failure of the flappers and most likely to the chipping of the vanes. Only in rare cases does anybody take the top of the pump off to check the flapper valve.
TELLTALE CLUES
One clue that you may have flapper problems comes when, upon shutting down the pump, rather than holding the vacuum, the pump begins to turn backwards as the air pushes out.
The customer in our shop ended up having a new pillow block bearing, a new driveshaft and a rebuild kit installed in his pump, including the new flapper valves.
Obviously, regular maintenance could have prevented most of these problems. So the next time you break down while you’re on the job and wonder why it happened, think about how much time you spent maintaining and checking the failed system. If there’s any consolation for this pumper, it’s that he’s not the only operator who’s been lax about maintenance and faced the consequences.
Continue reading for free